Protect with flashing all areas where the roofing is perforated with vents, vent pipes or other projections. The flanges of these flashing shall extend a minimum of 150 mm (6 in) onto the roof surface and have sufficient nails to hold them securely.
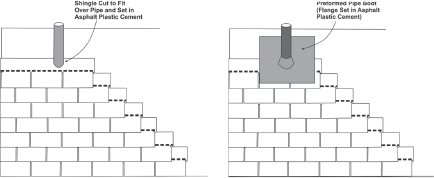
Shingling around a vent stack with strip shingles is quite simple. The roof flange of the flashing is shingled with adjacent shingle courses. The portion downslope of the vent sleeve should always lap the shingle course downslope and be left exposed and the part upslope should be shingled over by the course above. Generally, the bottom of the first shingle that goes over the flashing should be in line with the bottom side of the vent pipe. This will prevent water from going under the flashing at an angle and leaking through the roof around the pipe.
Sometimes a cutout or bond line of this first shingle will be even with the edge of the flashing. This can result in a leak. To prevent this, you can either slip a piece of shingle in under the bond line or apply plastic cement under the flashing.
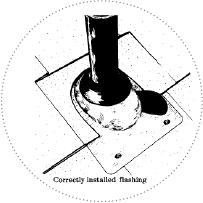 Always make clean, neat cuts around the vent flashing. Leave about a 12.7 mm (1/2 in) gap around the flashing sleeve so that dirt and granules will wash away freely. A tight cut will collect dirt and granules. This can cause the water to detour back under the shingles and result in leaks. Don’t use more nails than necessary to hold the flashing in place. Avoid exposed fastener heads. Seal any exposed fastener heads with compatible elastomeric sealant.
Certain products and/or materials may require special application procedures or precautions when applied at cold temperatures or exposed to high winds. These may include additional fasteners, adhesives or special application techniques.